
Set up food safety for one outlet
Register your fridges and hot-holding units, build a cleaning checklist from your paper form, log the first readings, and generate an inspection pack.
This tutorial replaces the paper temperature log and the cleaning checklist for one outlet, then shows you the inspection pack an inspector can open from a link.
Who this is for: managers and food-safety leads.
You will need: your current paper forms, the list of fridges and freezers, and the limits your food-safety adviser has given you. About an hour.
Step 1. Register the units you monitor
- Open Safety › Settings and choose the outlet.
- Add each monitored unit: walk-in chiller, upright freezer, hot-holding bain-marie, and so on.
- Enter the limit policy for each unit from your adviser's guidance.
If you have wireless sensors, register them under the same screen and assign each to a unit. Record calibration when it is done. Manual readings work without sensors.
Step 2. Log a temperature reading
- Open Safety › Temperature.
- Choose the unit and enter the reading. Readings inside the limit are recorded and you move on.
- A reading outside the limit opens a deviation. Acknowledge it by choosing or typing the corrective action you took, for example "moved stock to freezer 2, called technician". The deviation stays open until a reading inside the limit recovers it.
Deviations also appear on Today and in Safety › Alerts with the two-hour and four-hour product decision, so nobody forgets an open one.
Step 3. Build a checklist from your paper form
- Open Safety › Checklists and create a template. Name it as your form is named, for example "Closing clean".
- Add each line as an item. Mark the items that are critical; a critical fail asks for a note.
- Set the schedule: daily at closing, weekly on Monday, or on demand.
From the next scheduled time the run appears for the person on shift. They answer each item, add a note or a photo reference where needed, and the manager signs it off. Runs can also start automatically from other events, for example after a deviation.
Step 4. Record cooking and cooling controls
For dishes with a critical control point:
- Cooking: open the control, record the probe reading, and mark pass or fail. A fail prompts recook or discard.
- Cooling: open the control when the batch comes off the heat. Two stages count down to their deadlines; pass each stage, or the screen prompts a discard when a deadline is missed.
Step 5. Add licences, certificates and people
- Safety › Licences: premises licence, signboard, and renewal dates.
- Team › Training & certs: food-handler training and anti-typhoid vaccination per person, with expiry. An expired certificate warns on the roster.
- Safety › Halal (if certified): the certificate record, its review date, and the contamination and sertu logs.
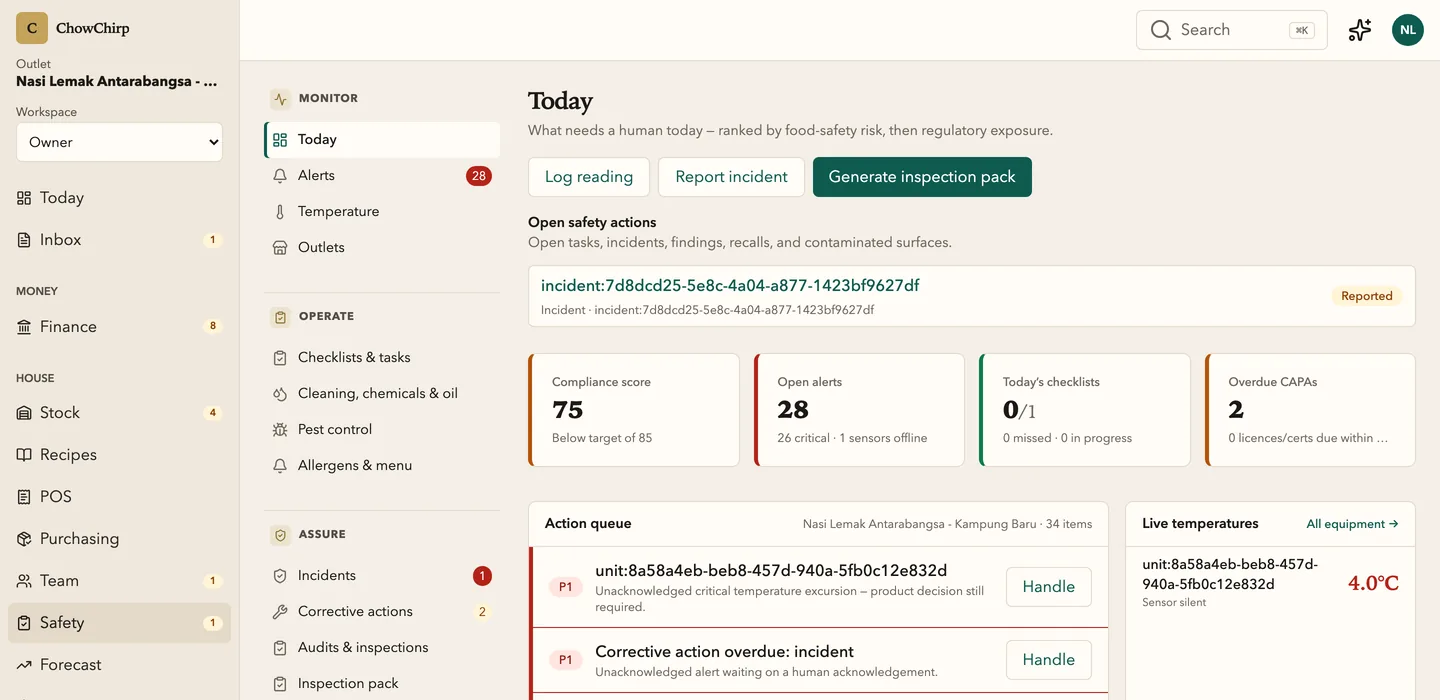
Step 6. Read the readiness gap list
Open Safety home. The readiness grid lists the gaps per dimension: a missing certificate, an unsigned run, an open deviation. Click a gap to fix it. The tiles above the grid summarise open alerts, today's checklists and overdue corrective actions.
Step 7. Generate an inspection pack
- Open Safety › Inspection.
- Choose the authority (MOH, JAKIM, DBKL or MeSTI), the date range, the recipient and an expiry (seven days by default).
- Choose link, PDF or both, and whether to include open items and apply personal-data redaction.
- Generate. Share the link with the inspector. Every view is recorded, and you can revoke the link when the visit is over.
The pack hasfixed sections and a manifest of evidence references. It never contains raw files or stored download links, and it never claims regulator readiness on your behalf.
What you have learned
- Units, limits and checklists come from your own forms and your adviser.
- Deviations ask for the action taken, so audit evidence exists without extra work.
- Readiness is a gap list you can act on.
- The inspection pack is a logged, expiring link.
Next steps
Updated 2026-09-16